

DIY Fall Tassel Decor Tutorial
Skill level: Beginner
Time needed: 15 minutes + dry time
There’s something so amazing about fall. I love the vibrant colors, the chill in the air and the joy of the season change. Inspired by the beauty of fall this easy tassel decor is a wonderful way to bring the feeling of fall inside this autumn.
Supplies:
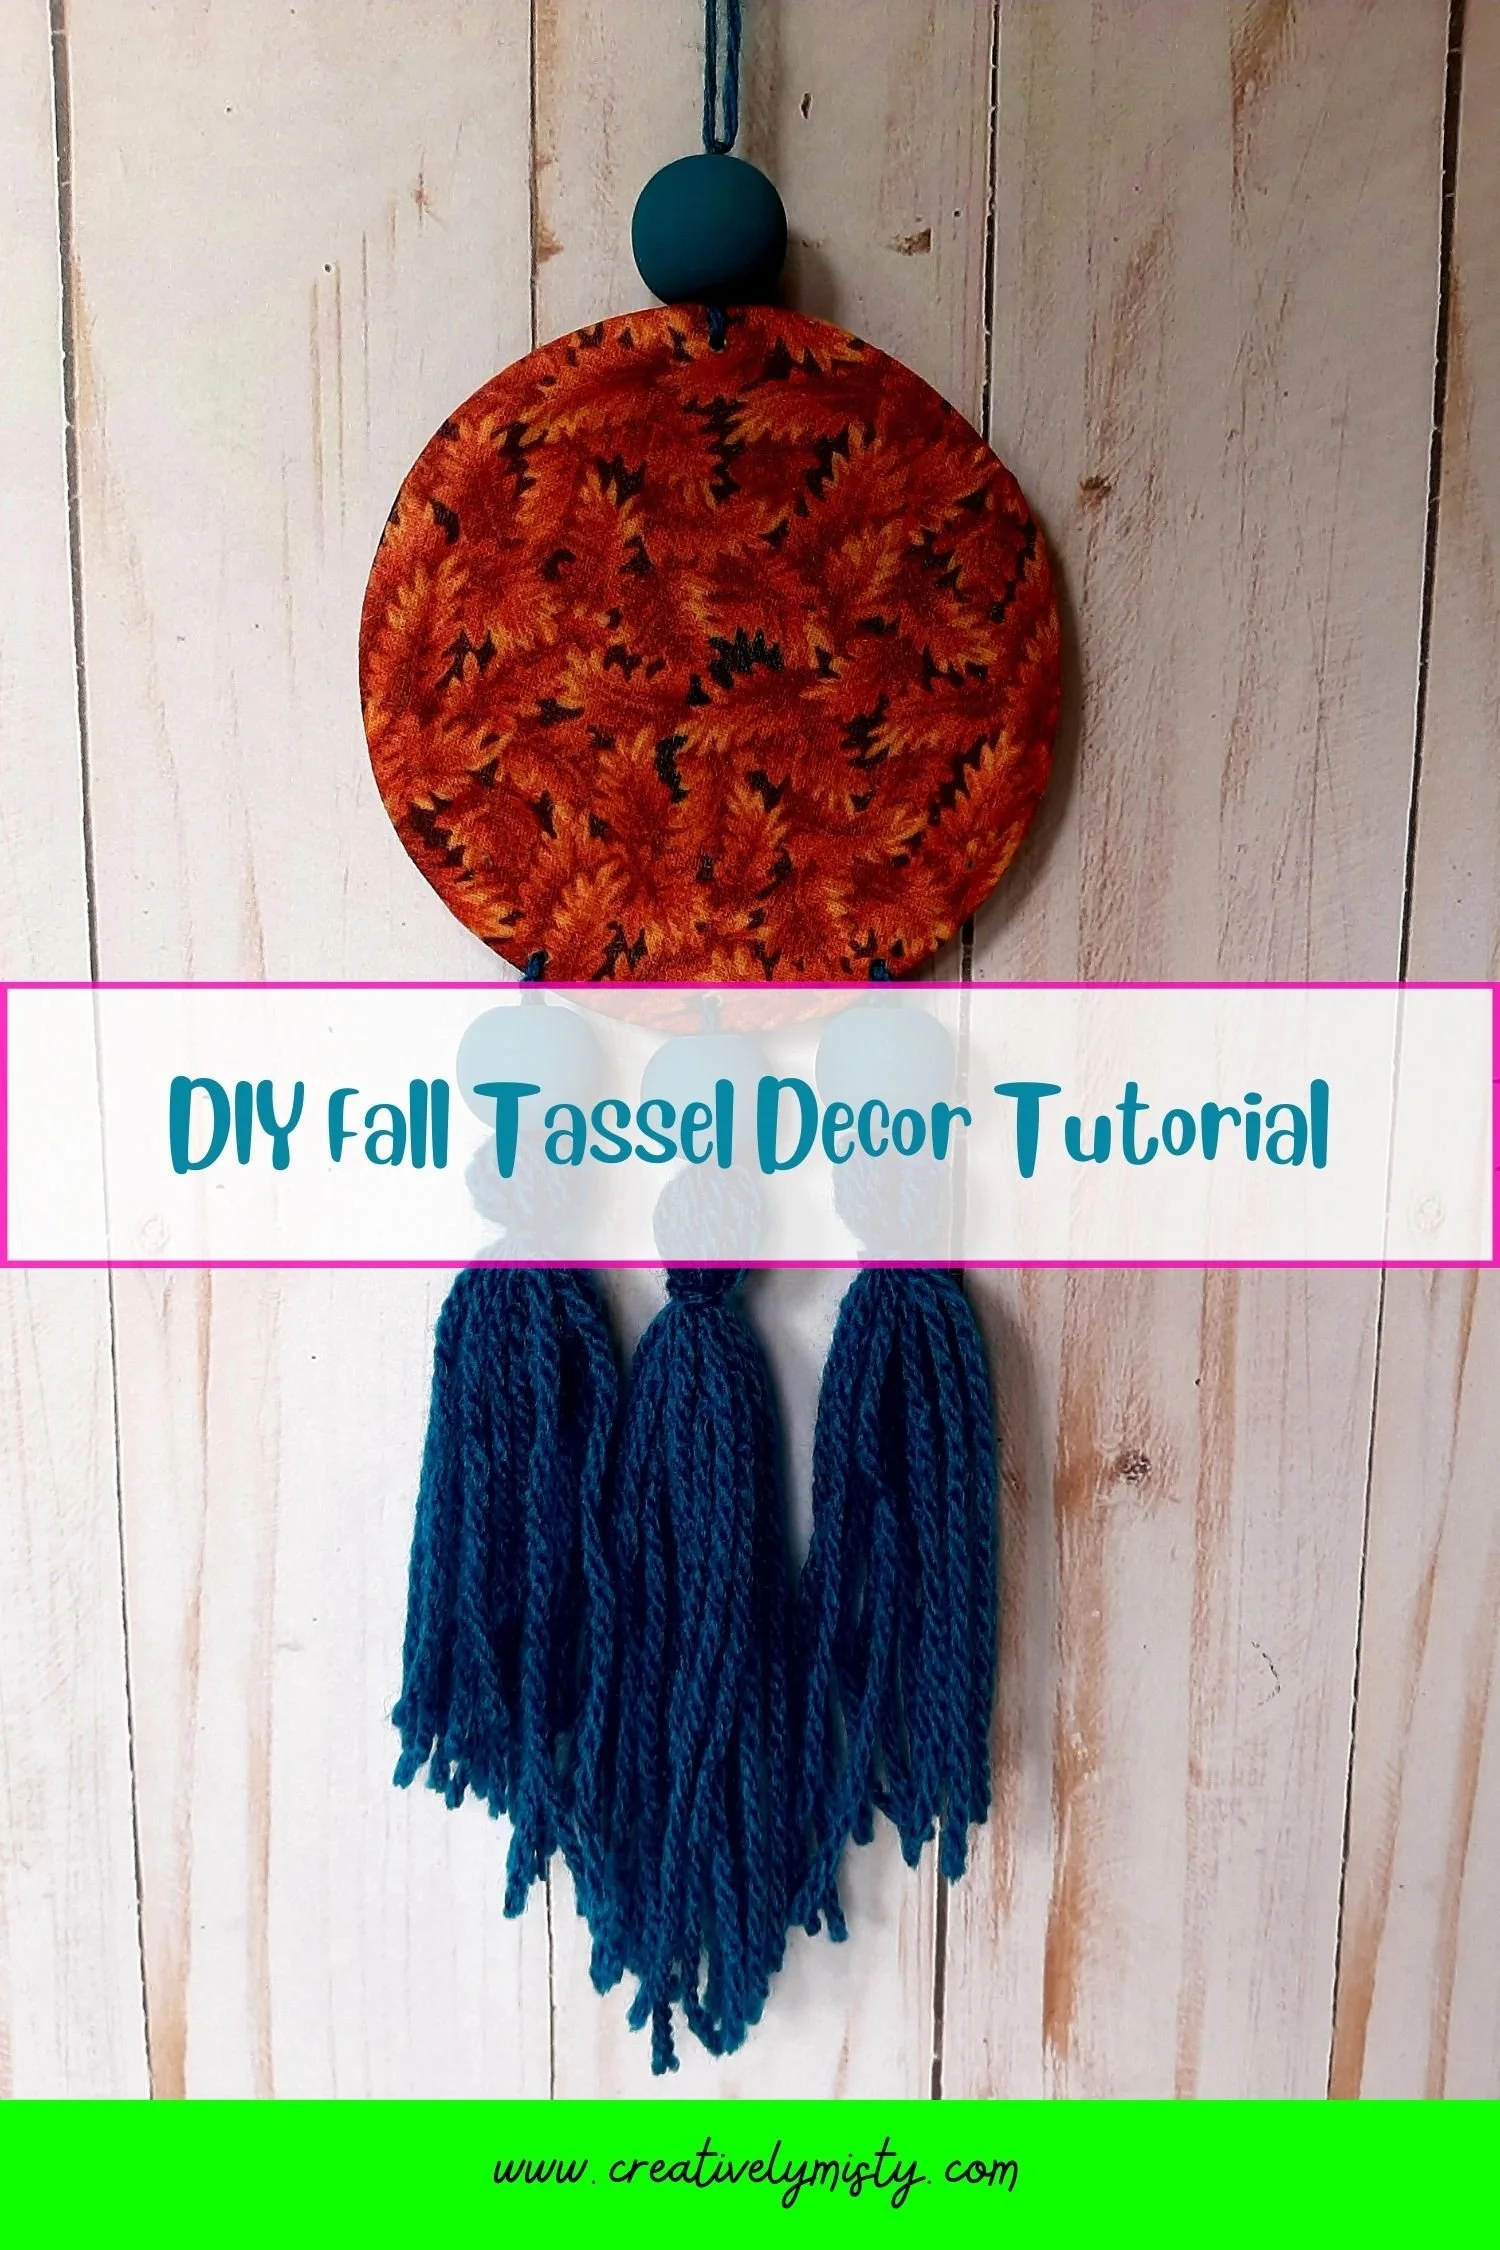
Tin can top
Fabric
Fabric scissors
Modge Podge
Beads
Yarn
Drill
Foam brush

Wash and dry the tin can “lid”.
File down any sharp edges around the lid.
Cut a fabric circle 1/2” bigger than the lid.
Adhere the fabric circle to the front of the lid. Let dry completely.
Cut from the edge of the fabric circle to the lid at 1/4” intervals.
Fold the cut fabric edge over the lid and glue in place. Let dry completely.
Cut a fabric circle 1/8” smaller than the lid.
Adhere the fabric circle to the back of the lid. Let dry completely.
Drill one small hole in the top edge of the lid.
Drill three small holes, about 3/4” apart, on the bottom edge of the lid.
String a length of yarn through the top hole and tie a knot.
String the yarn through a bead and tie a knot to hold the bead in place.
Tie the yarn ends together so you can hang.
String a length of yarn through the middle bottom hole and tie a knot.
String the yarn through a bead and tie a knot to hold the bead in place. Don’t cut the yarn just let it hang.
Cut ten 12” pieces of yarn.
Place all ten pieces of yarn, centered, against the bottom of the bead and tie a knot with the yarn that’s holding the bead in place. Don’t cut the yarn, let it hang with the other ten.
You should now have twelve 6” pieces of yarn hanging from the bead.
Tie a small piece of yarn around all 12 pieces of yarn about 1/2” from the bead. Make sure the knot is in the back so you don’t see it.
Repeat step 14-19 with both remaining bottom holes.
Cut the ends of the “tassels” as desired.
Happy Crafting,
Misty
I’d love to see how your new fall decor turned out! Post a photo to the Facebook community, Instagram with the hashtag #MadeWithCreativelyMisty, or below in the comments.
Love this free tutorial? There’s plenty more to choose from. Find more free tutorials here. Ready to up your crafting game? Look into booking one of my creative workshops.
