

DIY Glow-in-the-Dark Crystal Ball Tutorial

Sometimes I recommend and attach affiliate links to products in my tutorials. If you click on those links and buy something, I will make small commission at no extra cost to you.
Skill level: Beginner
Time needed: 30 minutes + dry time
Halloween is almost here and it’s time to get decorating! This easy to create Crystal ball will add just a touch of spooky to your decor and the best part is when the lights go out. So get crafting and see for yourself how fun this little kitty is to make.
Supplies:
Tin can
Acrylic paint- black, gray, metallic silver
Gesso
Plastic ornament
Paint brush
Spunge
Glow-in-the-dark acrylic
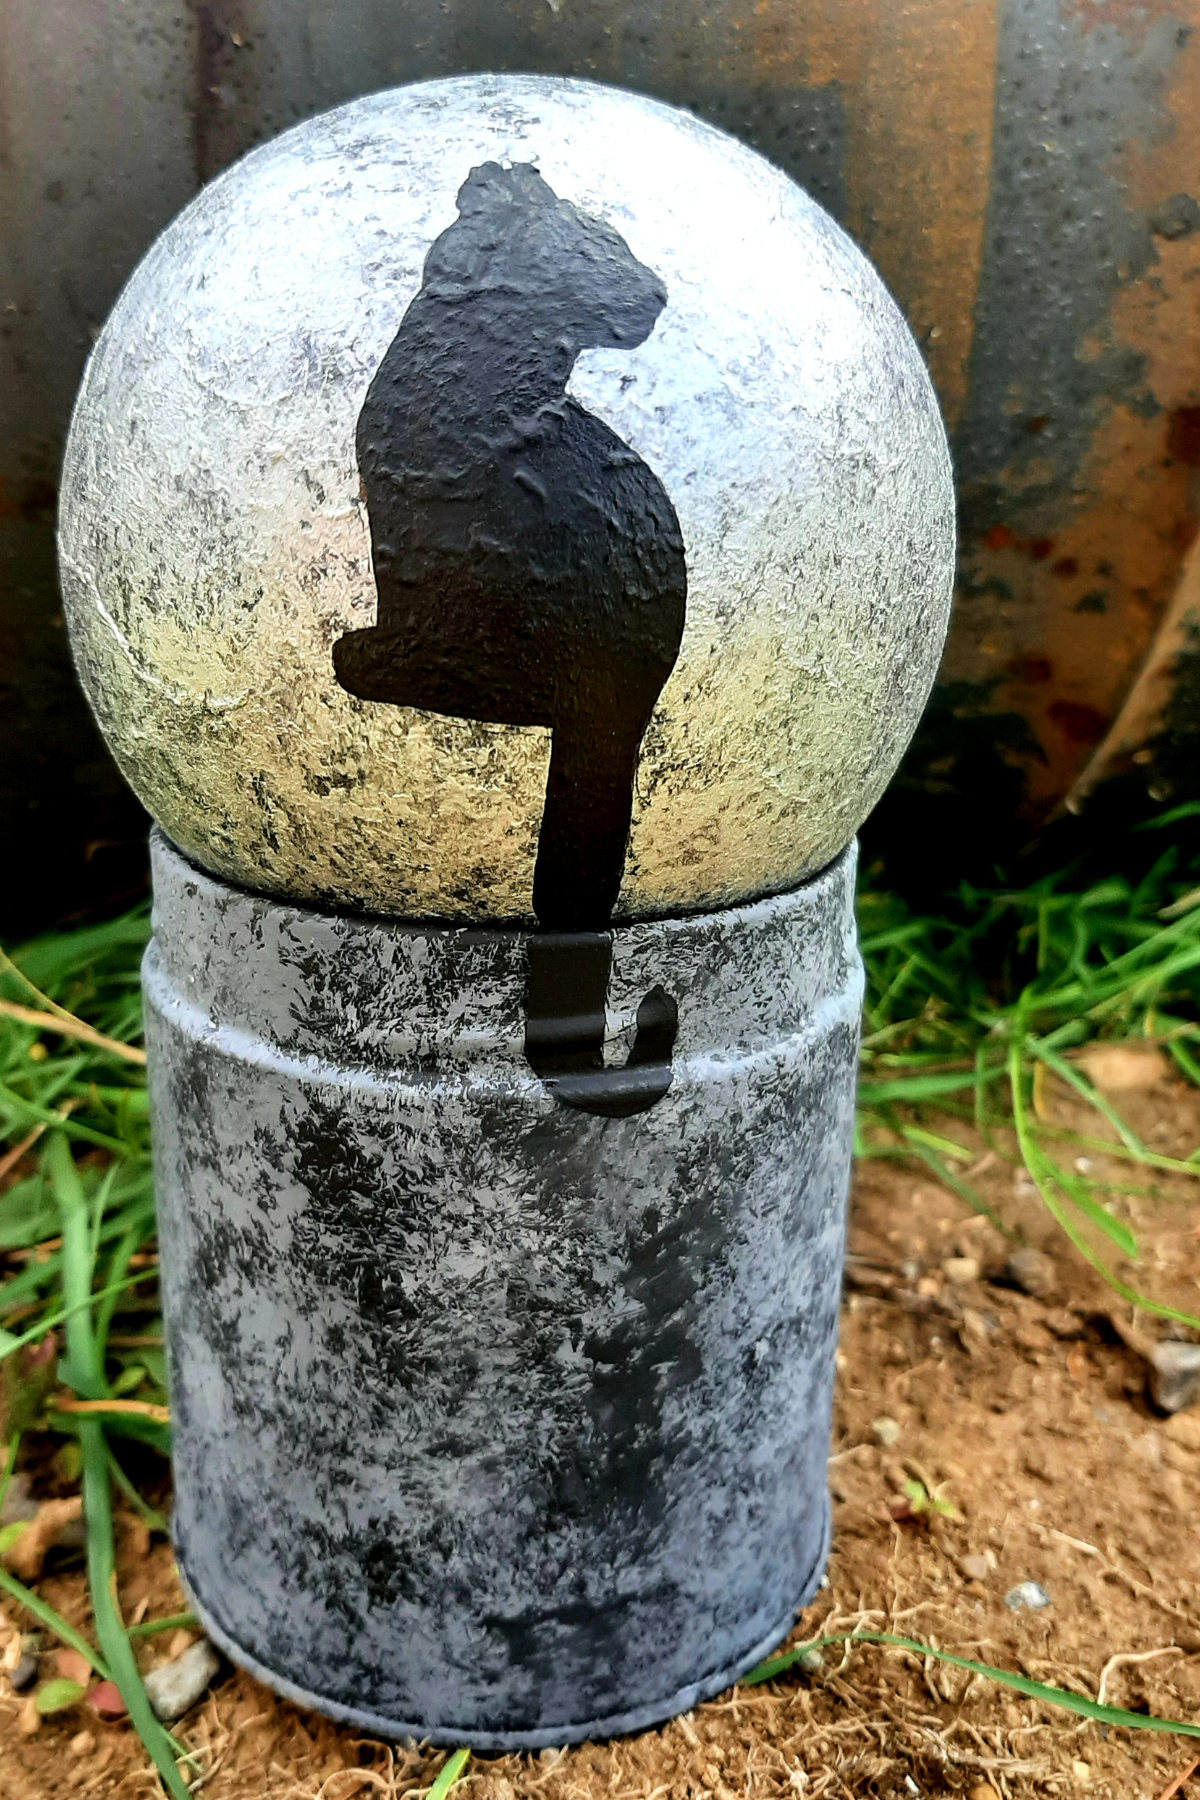
Clean and dry the tin can.
Paint the tin can with a thin layer of gesso and let dry.
Paint the tin can black and let dry.
Sponge a thin layer of gray onto the can, leaving spaces of black, and let dry.
Repeat step 1-3 with the ornament.
Sponge a thin layer of metallic silver onto the ornament and let dry.
Paint the ornament with several layers of glow-in-the-dark, letting dry completely in between layers.
Turn the ornament upside down so the neck for the hook will be inside the can when finished.
Paint your image (cat, witch, pumpkin, etc.) onto the front of the ornament.
Place the ornament upside down into the tin can. Glue in place if desired.
Happy Crafting,
Misty
I’d love to see your designs and what you come up with! Post a photo to the Facebook community, Instagram with the hashtag #MadeWithCreativelyMisty, or below in the comments.
Love this free tutorial? There’s plenty more to choose from. Find more free tutorials here. Ready to up your crafting game? Look into booking one of my creative workshops.
