

DIY Holiday Teabags
Sometimes I recommend and attach affiliate links to products in my tutorials. If you click on those links and buy something, I will make small commission at no extra cost to you.
Skill level: Beginner
Time needed: 30 minutes + drying time
The holiday season is the perfect time to cut down on spending and get crafting instead. This is why I love helping you find easy, DIY projects that won’t stress you out or break the bank.
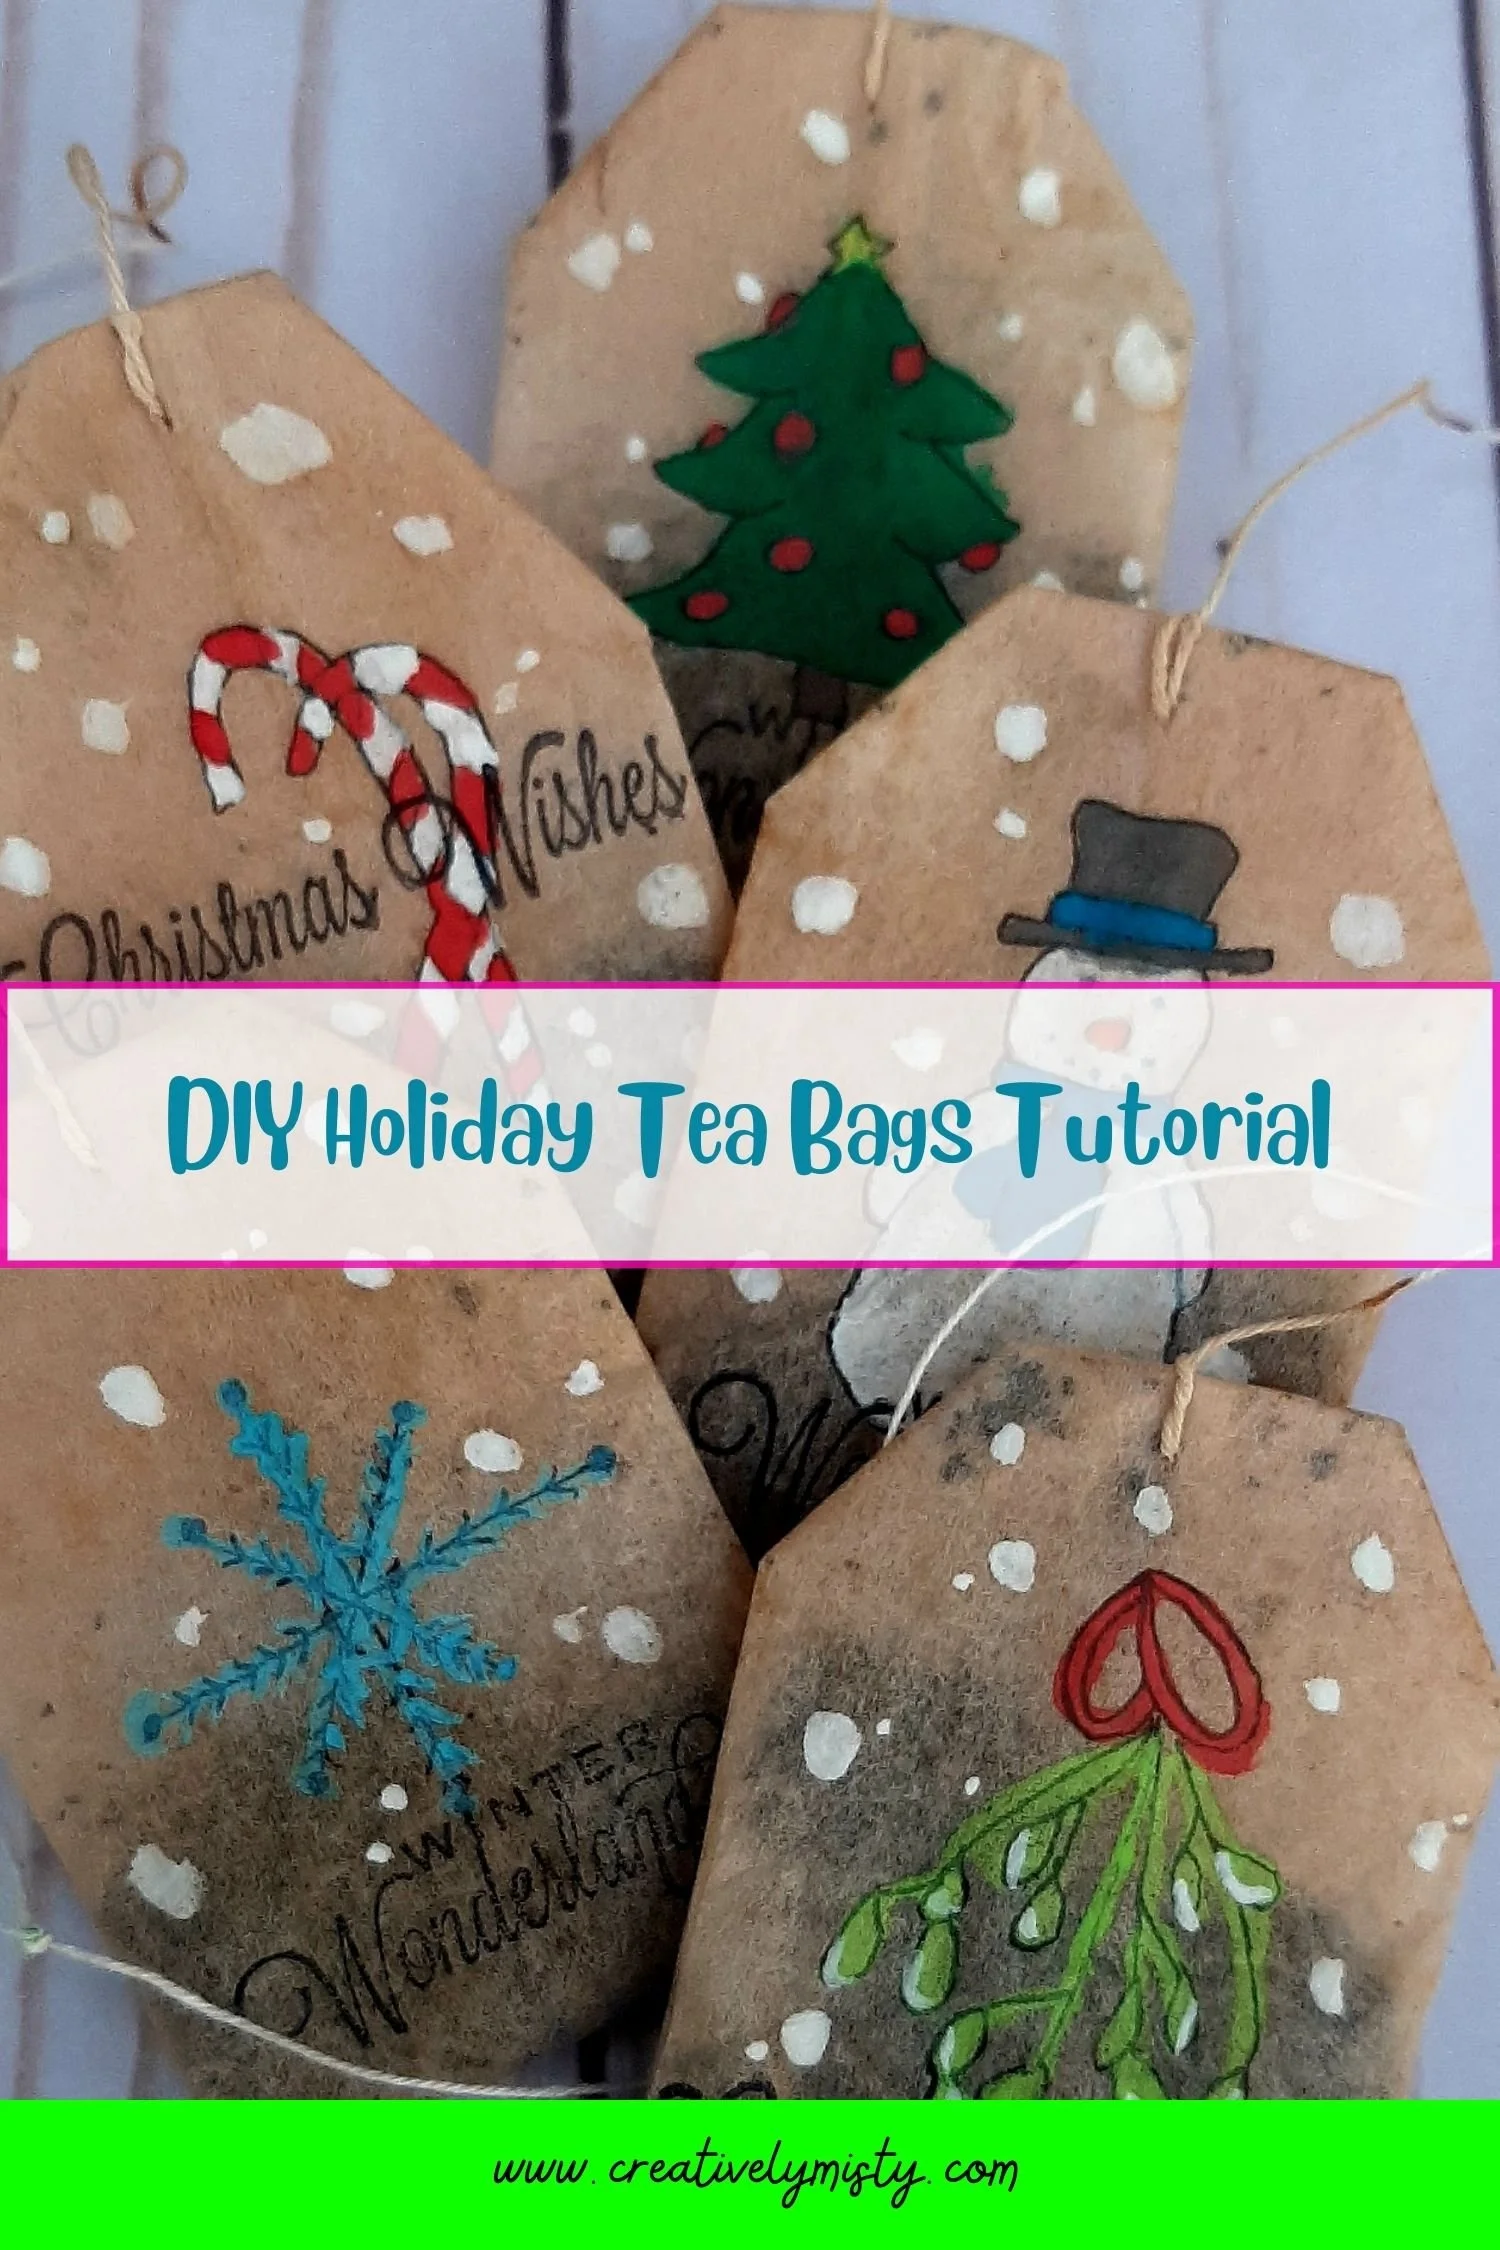
Today’s project is simple, fun and so easy to make. They can also be used in a variety of ways like ornaments for your tree, gift tags, or garlands just to name a few. They are completely customizable and can be made for any occasion.
Below you’ll find a simple supply list with easy-to-follow, step-by-step instructions.
Supplies:
Dried teabags with the tea still inside
Watercolor paints
Watercolor brush
Stamps

After you’re finished using your teabags, hang them up to dry for 4-5 days in a warm location. If you have a heat source like a floor heater vent or something similar you can hang them over it for faster drying. It’s important to make sure the tea inside is completely dry before continuing.
Shift the tea around in the bag so it’s a mostly flat layer inside the teabag.
Lightly draw your designs onto the teabag, be sure not to poke any holes with the pen.
Watercolor over the designs as desired.
Watercolor “snow” dots randomly around your design if desired.
Shift the tea around in the bag so it’s all at the top or bottom (depending on where you’ll be stamping) of the teabag. Stamp onto any tea may cause you’re stamp not to transfer completely and be unreadable.
Stamp your phrase onto the flat teabag.
Tie to your gift, add an ornament hanger and hang on your tree or tie together with twine for fun garland.
Happy Crafting,
Misty
I’d love to see your designs and how you’re using your new decorative tea bags! Post a photo to the Facebook community, Instagram with the hashtag #MadeWithCreativelyMisty, or below in the comments.
Love this free tutorial? There’s plenty more to choose from. Find more free tutorials here. Ready to up your crafting game? Look into booking one of my creative workshops.
